
How to Create a Custom AI Writing Assistant (Without Feeling Overwhelmed)
First Steps to Using AI in Your Writing Process (Without Losing Your Creative Voice).

Hey AI novelist,
Last week, we talked about how a Custom GPT can be your secret weapon for brainstorming new ideas, refining your author brand, and understanding your readers better. [HERE] Now, it’s time to take the next step—let’s actually build one.
I know the idea of creating your own AI writing assistant might sound overwhelming, but trust me—it’s easier than you think.
You don’t need to be a tech wizard to do this. And by the end of this post, you’ll have a Custom GPT that fits your style, goals, and writing process.
Let’s get into it, step by step.

Why Would You Even Want to Build a Custom GPT?
Before we begin the setup process, let’s remember why we’re doing this in the first place.
Custom GPTs are not about replacing your creativity—they’re about supporting it. For me, I wanted to:
Understand what my readers love about my stories—digging deeper into their feedback so I could improve my books and align with their expectations.
Build a stronger, more cohesive brand—making sure my books felt intentional and reflected the voice I wanted to be known for.
You might have different goals. Maybe you want to:
Get unstuck when brainstorming
Fine-tune character arcs
Organize your beta reader feedback
Whatever the case, you can design your Custom GPT to help with your writing process. Now, let’s get started.

Step 1: Get Clear on Your Goals
How will you use this Custom GPT?
Before we jump into setting up your Custom GPT, you need to get clear on what you want it to do for you. Without this clarity, it’s like giving directions to someone without knowing the destination.
For me, I needed my GPT to help me understand reader feedback and refine my brand. Your needs might be different, so let’s figure out what they are.
Here’s how you can start:
Ask yourself these questions:
What part of the writing process do I struggle with the most?
What tasks do I wish I had an assistant for—brainstorming, organizing feedback, or something else?
Go back to previous exercises. [HERE]
When in doubt, ask the model.
Once you know what you need help with, it’ll be much easier to build your GPT around those specific tasks.
What’s great about this process is you can create GPTs specific to the task. So, treat this one like a training exercise.
We’re just getting our feet wet.
Creating Custom GPTs is a benefit of using the paid version. There are ways to simulate the same or similar process. It’s not as good, in my opinion. But I’ll share alternatives below. ✍🏾

Step 2: Create Topics to Organize Your Information
Now that you know what you want your GPT to help you with, the next step is to organize all the information you’ll feed the knowledge base.
Think of the knowledge base as a digital library tailored just for you and your writing process. It's where you'll store all the important information that makes your writing unique—your voice, your themes, your brand.
I’ll direct this post towards your brand because that’s how I use it. But know that you can create GPTs for just about anything.
But remember, your Custom GPT is only as good as the information you feed it.
This process is like giving your AI assistant a "You 101" crash course. The more organized and detailed this information is, the better your GPT will understand your needs and style.
It’s not the quantity but the quality of your information.
Start with the basics:
some examples of your writing,
notes on your brand,
maybe some reviews from readers.
The information should align with the task you want your GPT to complete.
Then as you use your GPT more, you can always add to this knowledge base, helping it grow and evolve with you.
Remember, this is about making the AI work for you, not the other way around. So take your time, be selective, and focus on what matters most to your writing journey.
Here’s how I did it:
My GPT assists me with idea generation. To facilitate this, I gathered information in specific categories to help my model become the best brainstorming partner.
My categories are:
Brand Details: This is where I store all the information about my author's voice, themes, and brand.
Niche Reports: I collected research reports on what’s trending in my genre and what readers love.
Story Ideas: A running list of concepts, characters, themes, and tropes I wanted to explore.
Essentially, I digitized my process.
You can start with a pen and paper. But ultimately you’ll need to upload these details into Chat GPT. Then review the file types the system accepts.
To make it simple, I save everything as text files.
Remember, this is just a test drive.
The cool part is you're building on top of an already intelligent model. Your goal is to provide specifics about yourself so the AI doesn't rely on generalities when generating your output.
Look out for a video demonstration on some ways to gather these details.

Step 2.5: Ask the Model to Guide You
I promised this would be easy for us non-techies.
This is a great time to open a fresh chat and ask the model.
Let’s ChatGPT know that you’re working on a Custom GPT, how you plan to use it, and the information you’ve gathered.
Here’s what I recommend:
Ask the model to create a workflow for you. This will guide you through the process.
Then get clarity on the tasks you want your CustomGPT to fulfill and have the model write instructions for you.
I’d close out this segment of the chat with requesting any necessary templates.
I’m sure we’ll talk about this in a future post. But templates are like gasoline when you have a great prompt. It will make your output fire. 🔥
Save this chat. You can always come back and refine what you need later.
Let’s continue.
Step 3: Feed Your GPT
Now, it’s time to start feeding your GPT the information.
This is where you make sure your GPT understands what makes you unique as a writer. You can also include where you’d like to grow, or the direction you’re taking your brand.
By the time I get to Step 3, I have folders on my computer with five to ten individual text files. This is extremely unique to you, your brand, and how you want to work with this GPT.
But stay clear on your goals. The more specific you are the better you can guide the AI into giving you exactly what you need.
This will get clearer as we move through this series and apply these steps to specific use cases. For now, give it what you got!
Here’s how I did it:
I had my three categories in folders on my computer. Each folder contain everything I gathered for the process. Here’s just some of what I had:
Author bio, brand statement, prominent themes and tropes.
Reports on my top categories in Amazon. I had about four of them.
I had notes of where I was taking my brand and some of the concepts, characters, themes, and tropes I wanted to explore.
This isn’t set in stone. This is what worked for me.
So, I encourage you to start with the basics, play with it, and evolve from there.
You’ll see this in the upcoming demonstration.
Keep It Simple:
Start small: You don’t need to master everything right away. Pick one area where you need help—brainstorming, organizing feedback, or refining your brand—and focus on setting up your GPT to assist with that.
You’re already doing the hard part: Gathering your notes, writing down your ideas, and refining your brand—all of this is already part of your creative process. The GPT helps you manage and expand those ideas more efficiently.
No coding required: Setting up a Custom GPT isn’t about learning complex tech. You’re feeding the AI information—your writing, your brand, your goals—and letting it process that information to support you.
Take it one step at a time: It’s easy to feel overwhelmed when starting something new. Remember, this tool is designed to assist you, not complicate things. If you start to feel stuck, take a step back, refocus on what you want to achieve, and return to the process.

What If I Don’t Have the Paid Version of ChatGPT?
I know some of you might be thinking, “I don’t have the paid version of ChatGPT—can I still create a Custom GPT-like experience?”
Absolutely!
While the free version doesn’t allow you to create fully Custom GPTs, you can still simulate many of its functions and get powerful support for your writing.
The key is to get creative with how you interact with the free version. Even though you won’t have a fully tailored assistant, you can guide the free version to behave in ways similar to a Custom GPT by being strategic with your inputs.
Here’s How You Can Simulate a Custom GPT with the Free Version:
Train ChatGPT with consistent prompts:
You might not be able to formally “train” a free ChatGPT model, but you can guide it by using the same or similar prompts and providing it with examples and/or templates.
Give the model primer content:
Custom GPTs allow for long-term memory, but in the free version, you can still simulate this by using primer content.
This is something I stress with my students. Create a paragraph or two that you consistently use to orientate the model for working with you.
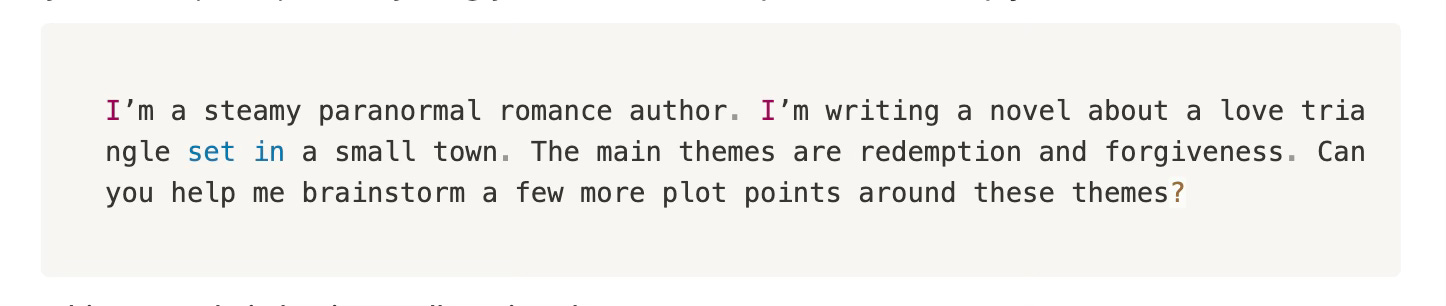
For example, if you’re working on a romance novel, start every session with a reminder of your niche, tone, and anything you believe will help the model help you.
This example is basic. We’ll get into better, more custom, prompts soon.
Using this structured approach, you guide the AI to work within your existing narrative, keeping it aligned with your goals without needing a paid account.
Store information manually:
Since free ChatGPT doesn’t have memory between sessions, keep a document where you store the best responses you receive from ChatGPT.
Treat this document like your Custom GPT database, filled with ideas, character sketches, and plot suggestions you’ve generated. This way, you’ll have a running list of ideas you can revisit anytime, just like you would with a Custom GPT that remembers your inputs.
For example, after each session, copy and paste the useful responses into a Google Doc or Notion. Over time, this becomes your personal “brain” of ideas generated by the AI—ready to reference whenever you need a creative boost.
I also like to save “the good stuff” as text files. This makes it easy to use in any model.

Here’s What You Can Do Right Now
By now, you’ve got a solid understanding of how to set up your Custom GPT and make it work for you. Ready to dive in?
Get clear on your goals: Write down what you want your GPT to help with—brainstorming, branding, feedback, etc.
Gather your information: Organize your notes into sections (Brand Details, Research, Story Ideas) to create your knowledge base.
Feed your GPT: Give your GPT everything you got. Now, don’t give it everything, literally. Select with discretion. But this is when feed that baby!
Test and Train: This is when you play with what you’ve created. Test drive it and see if it does what you need. You might need to add more information, you might need to create a specific workflow, and what’s cool is you can ask the model to guide you through the entire process.
What’s Next
All right, my AI writing friend, it’s time to roll up your sleeves and dig in.
Next week, we’ll explore how to use your Custom GPT to refine your author brand. We’ll talk about how AI can analyze your writing style, recurring themes, and reader feedback to help you create a brand that resonates with your audience.
You won’t want to miss it!
I'm looking forward to hearing from you, and I’ll see you next week with more ideas, inspiration, and AI writing tips.
Happy Writing,
Coach Dana
AI Novelist Takeaways
Custom GPTs are here to support your creativity, not replace it. They’re your brainstorming buddy, there to help generate fresh ideas and keep you moving when you feel stuck.
Personalization is key. The more you feed it—your style, brand, and voice—the better your Custom GPT will understand your needs.
Start simple and build over time. You don’t need to master everything right away. Start with one task, like brainstorming or organizing feedback, and expand from there.
Question for You:
Have you used Custom GPTs in your process? If yes, how so? And if not, will you give this a test drive?
I’d love to hear your thoughts—drop a comment below!